Ad Account Labels
Ad Account Labeling provides a flexible way for Platforms to organize Ad Accounts using customizable key:value pairs. Labels can indicate details like account tier, managed status, category, or any other grouping the Platform defines for operational use, as shown in the example below.
| Label Key | Label Value | Associated Ad Account IDs |
|---|---|---|
| Tier | Platinum | seller1, seller2, seller3 |
| Tier | Gold | seller4, seller5 |
| Tier | Silver | seller6, seller7, seller8 |
| Tier | Bronze | seller9, seller10, seller11, seller12 |
| Category | Furniture | seller1 |
| Category | Outdoor | seller2, seller3 |
| Category | Decor | seller6, seller7, ...... |
Once you create a label, you can define its values and assign ad accounts to it. Later, you can use those label assignments to represent the ad account groups you’ve already set up.
Limits
- Maximum labels per platform: 100
- Maximum label values per label: 500
- Maximum ad accounts per label value: 10,000
- Maximum label values an ad account can be associated with: No limit
Managing Labels
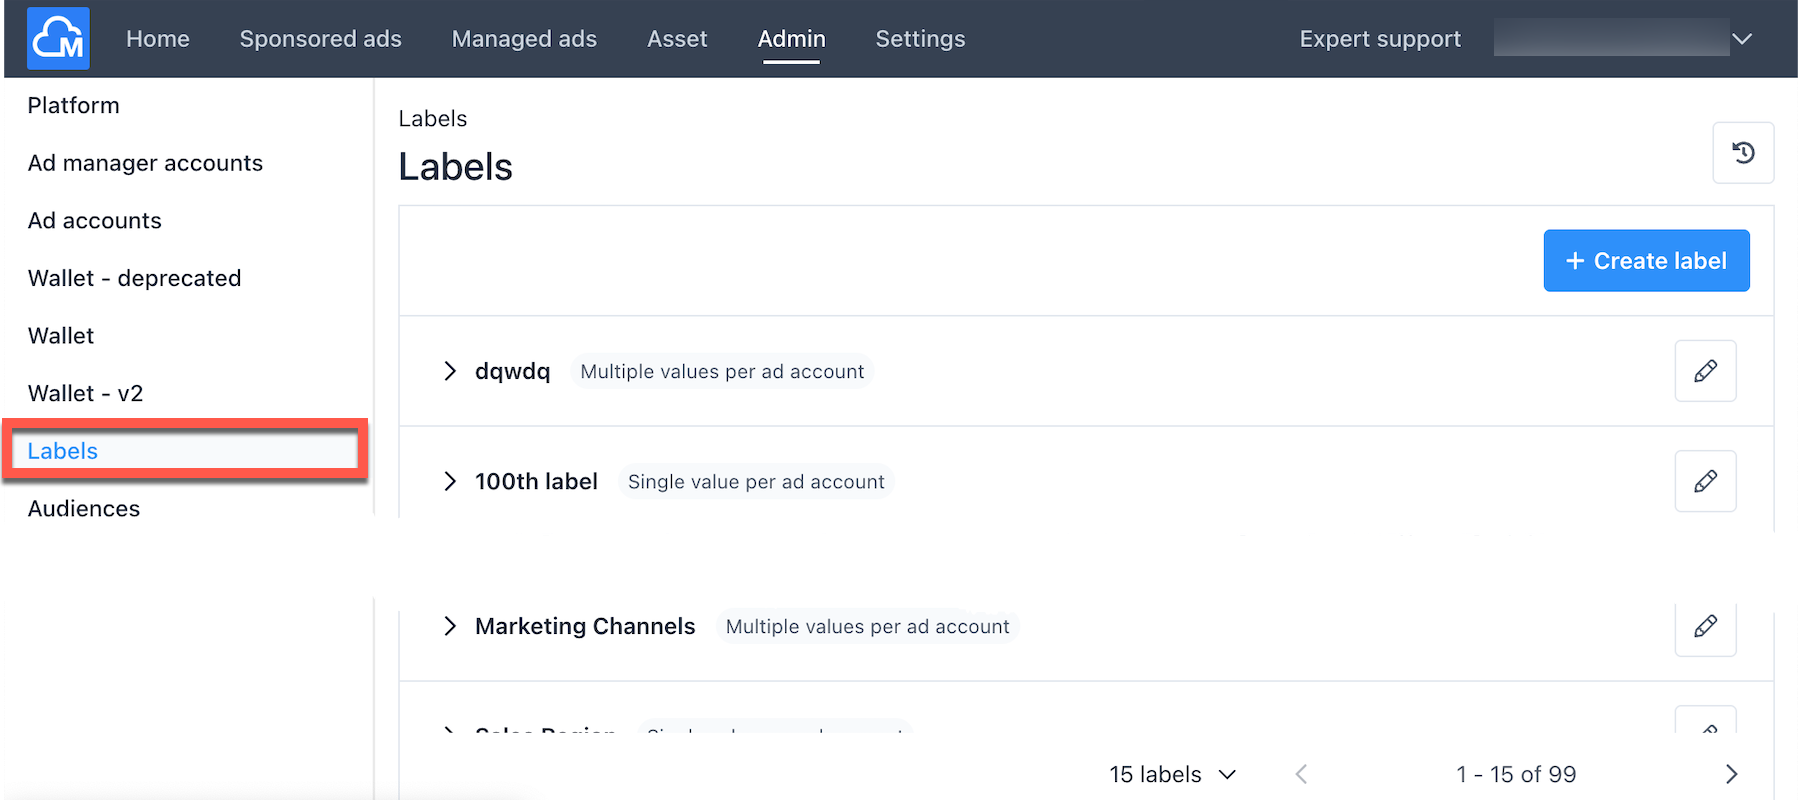
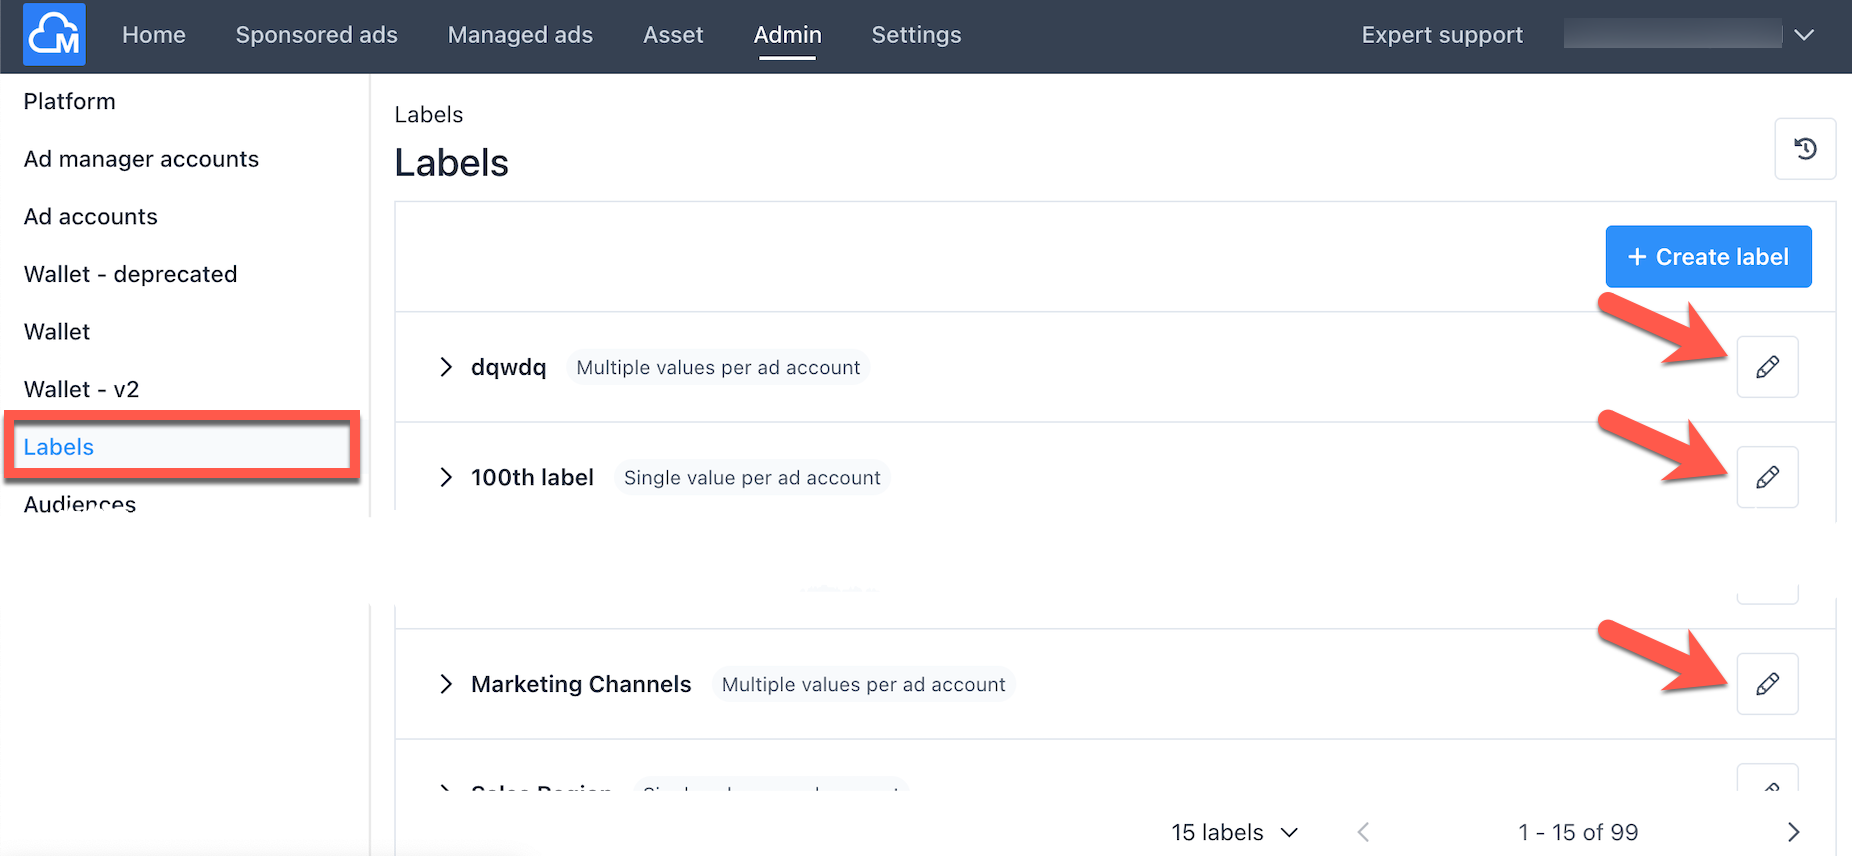
You can view all created labels by going to Admin > Labels in your Campaign Manager Portal.
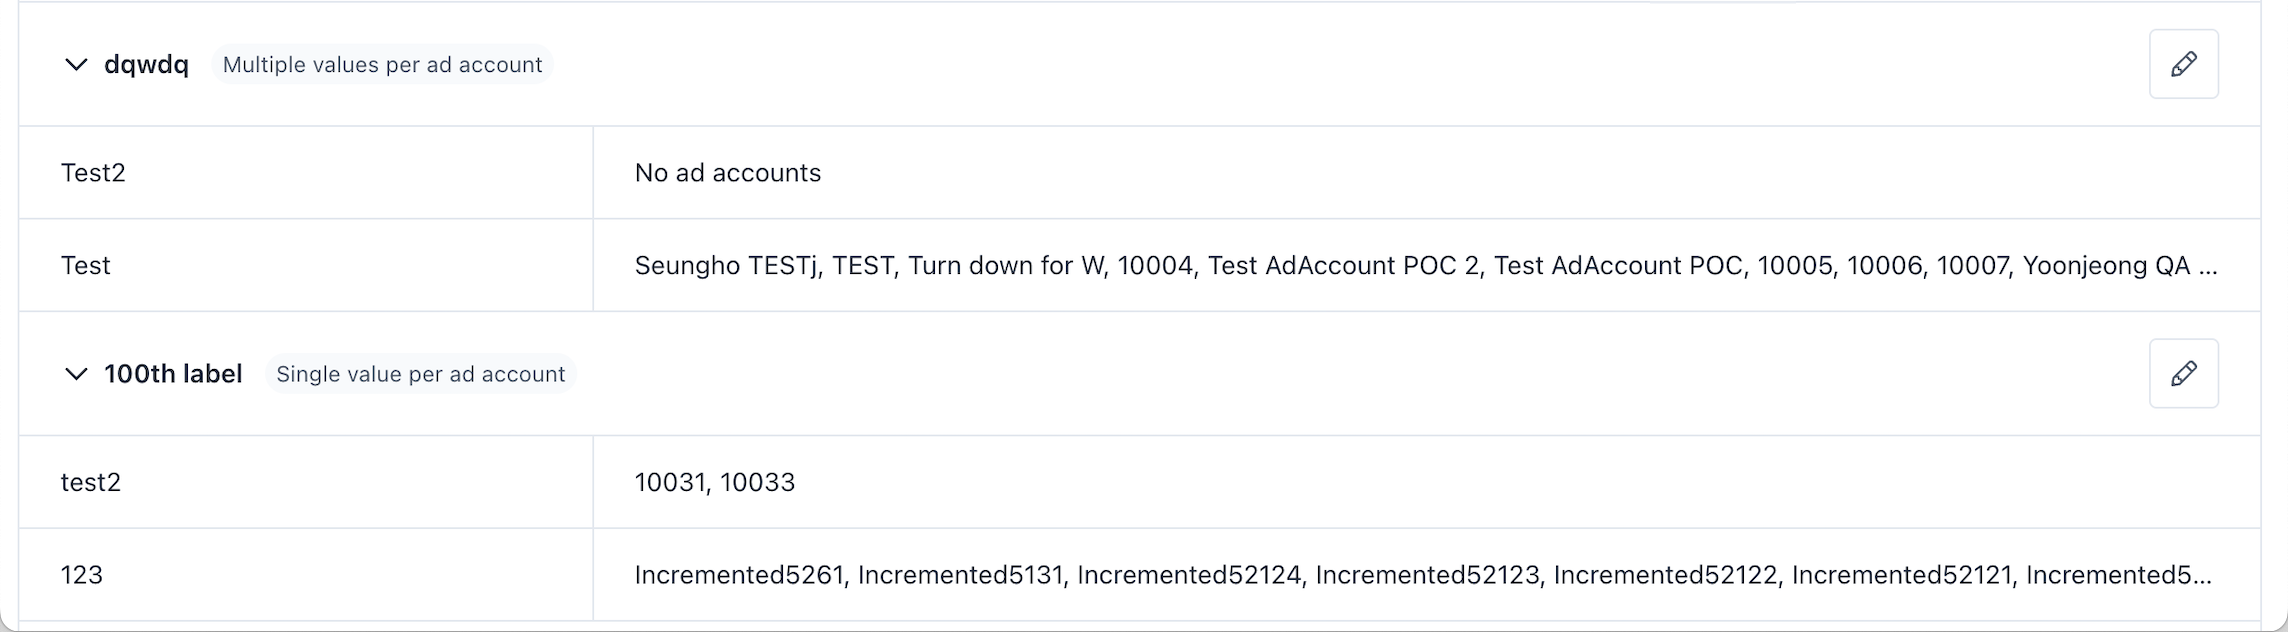
Expanding a label will show its values along with a snapshot of up to ten associated ad account names.
Creating Label
To create a label, click the Create Label button.
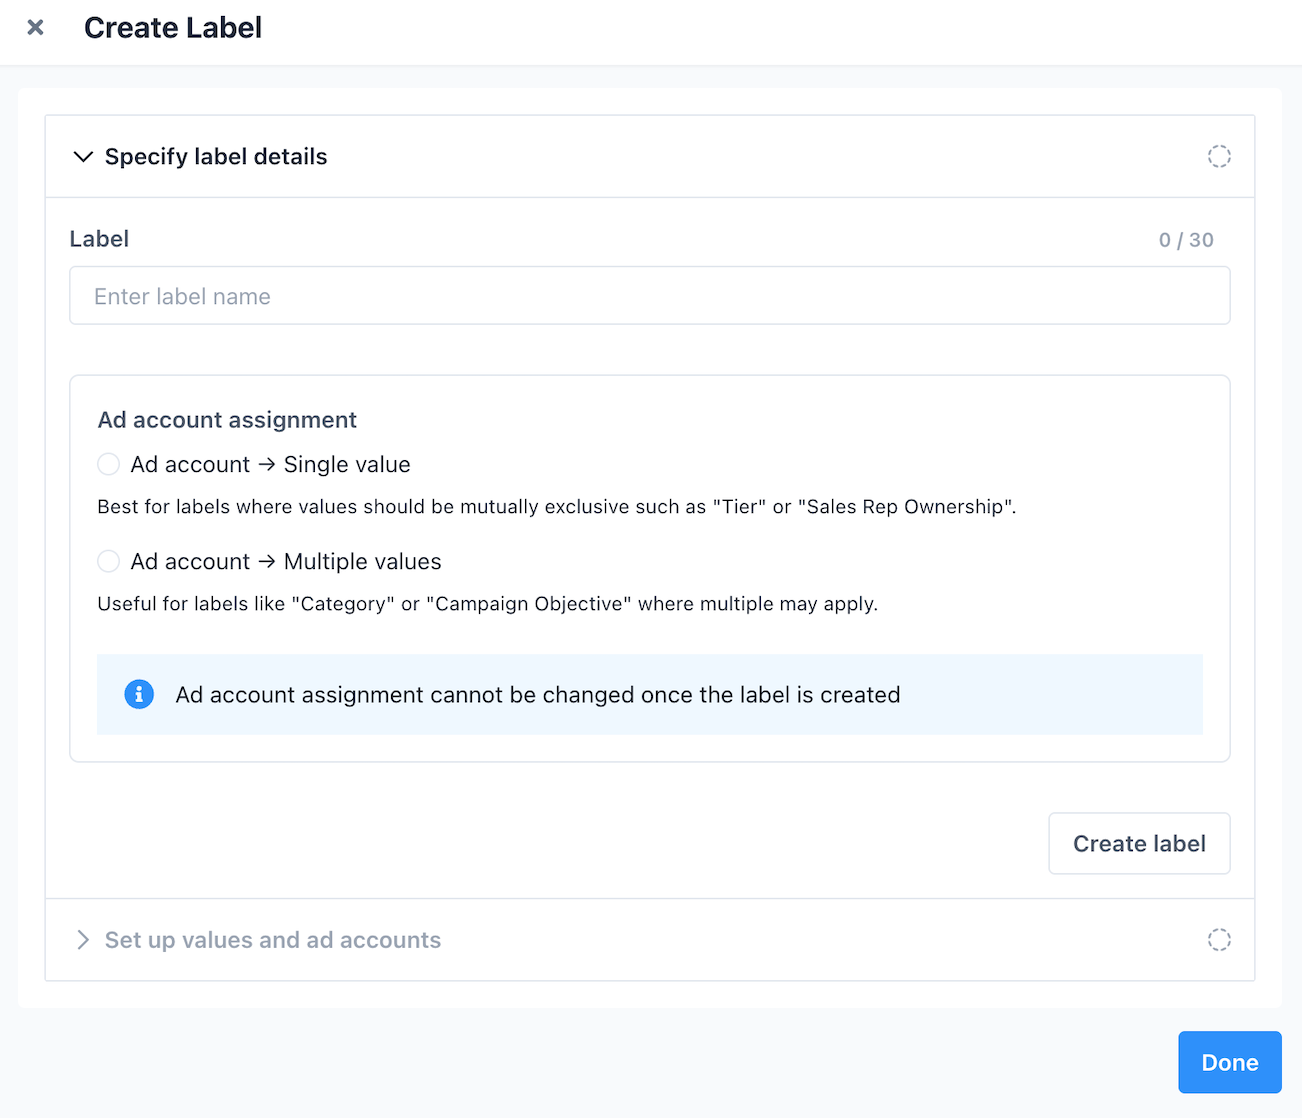
- Enter a label name
- It must be unique within the platform and not match any existing label.
- Choose an ad account assignment type
- Single value: Each ad account can be associated with only one label value.
- Multiple values: Each ad account can be associated with more than one label value.
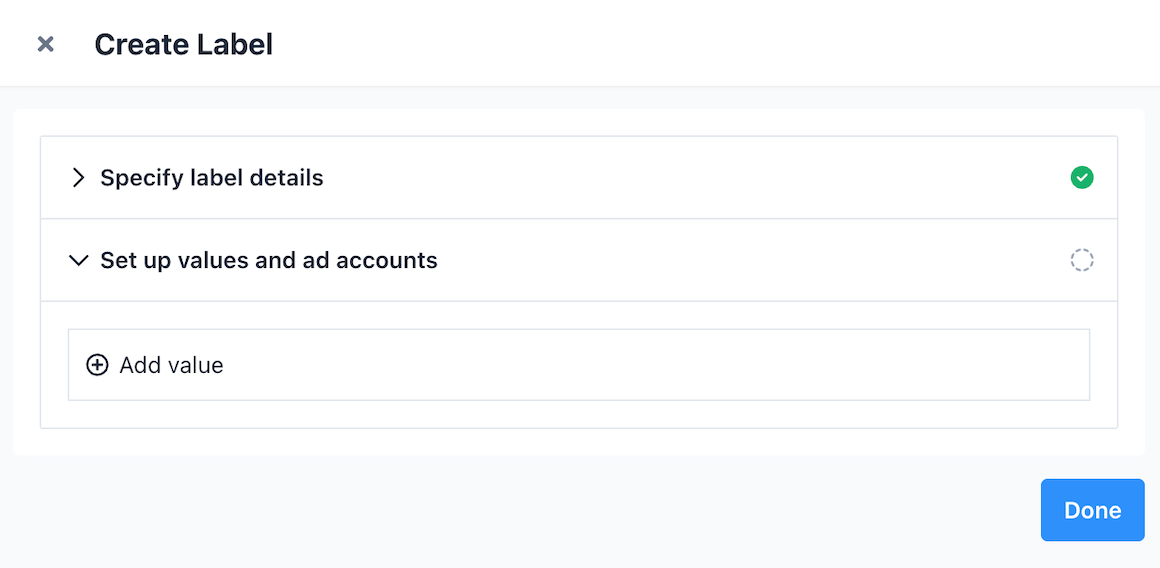
Clicking the Done button will create the label. After that, you’ll be able to set up label values, as shown in the screenshot below.
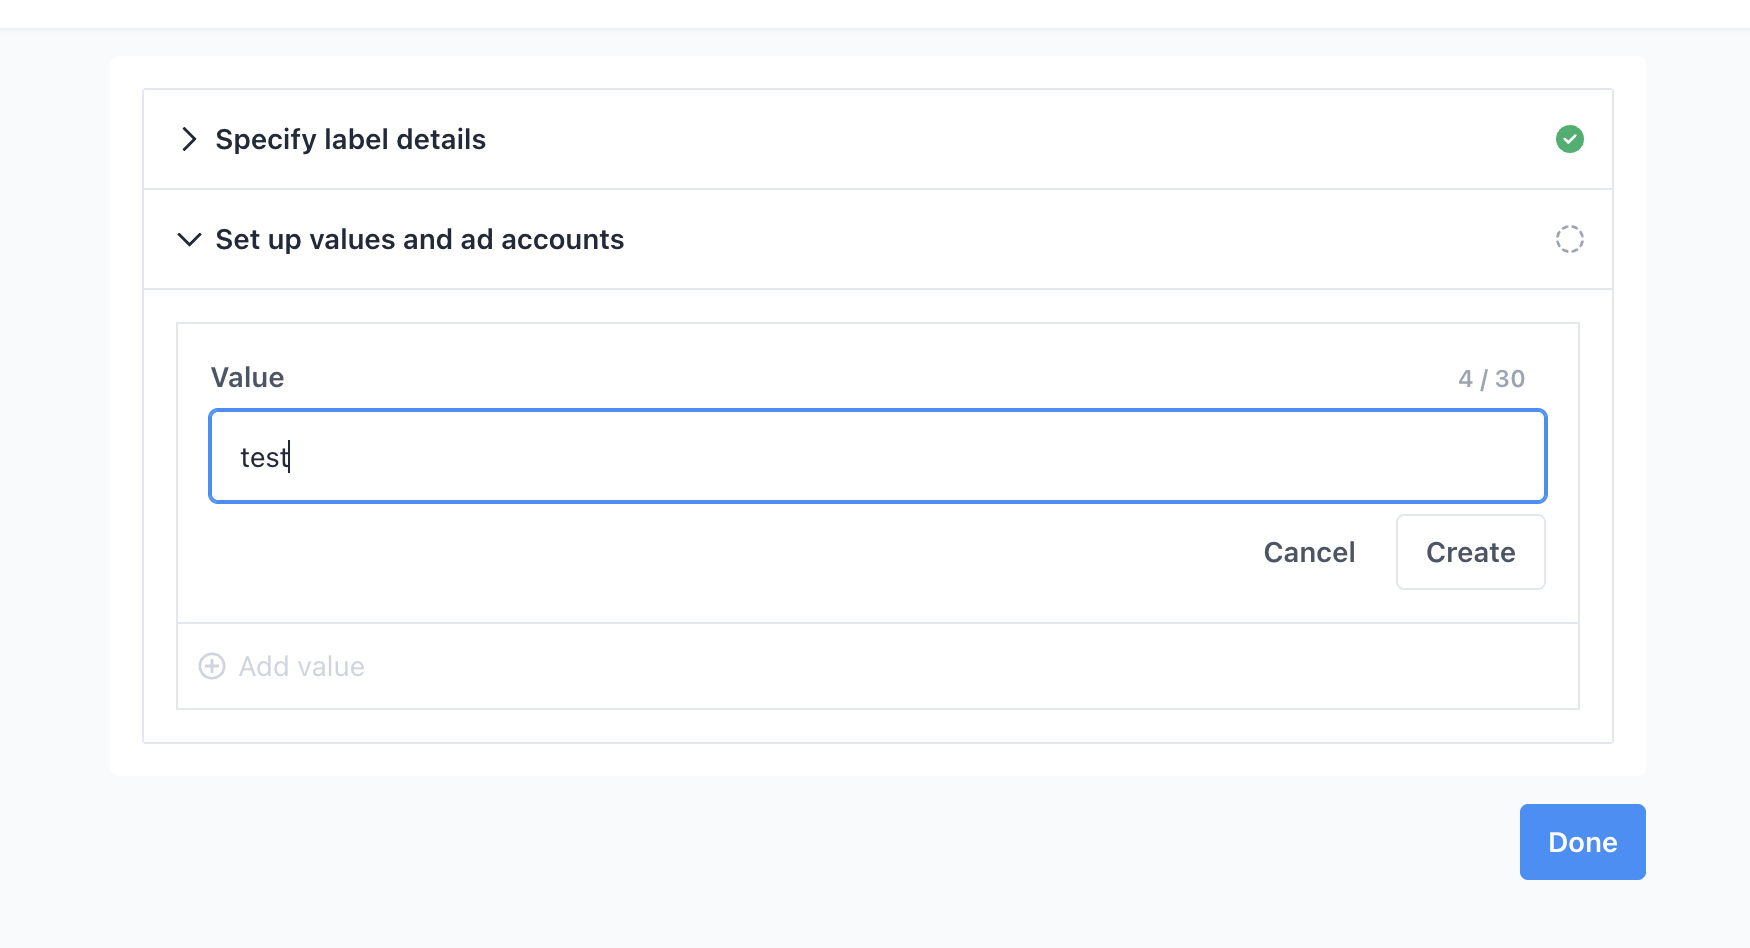
Clicking the Add Value button will open an input box (as shown in the screenshot below), where you can enter a label value. Duplicate values are not allowed within the same label.
After a label value is created, you can edit or remove it, as shown in the screenshot below.
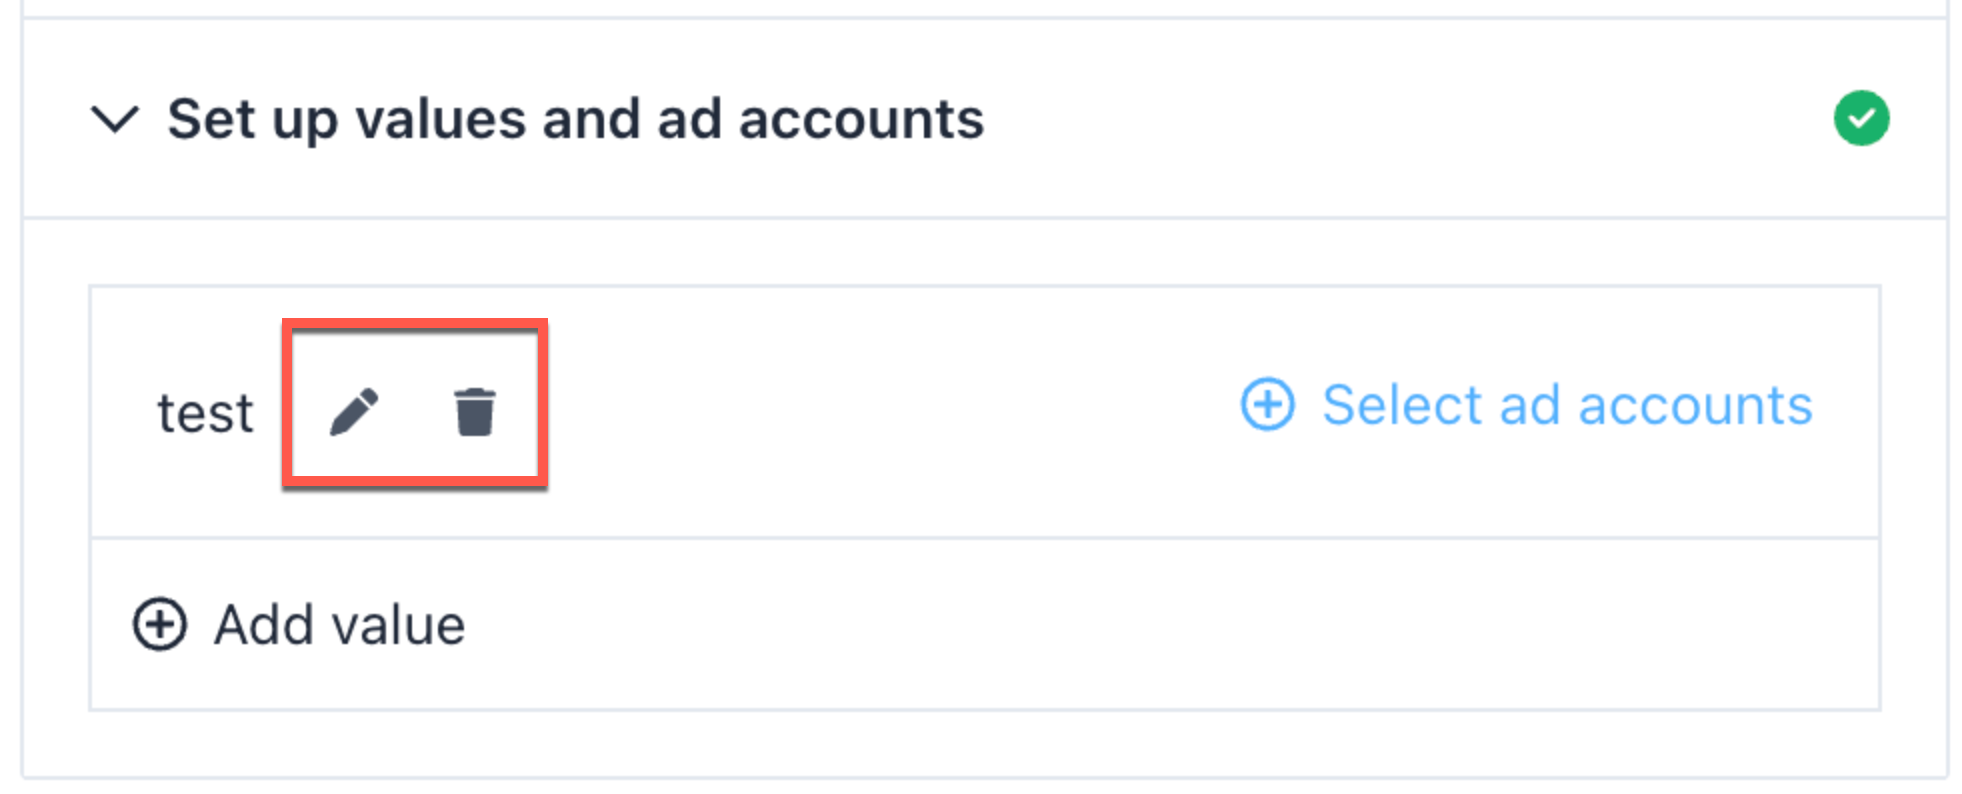
Once a label value is created, you can assign ad accounts to it by either selecting them manually or uploading a CSV file. Just click the Select Ad Accounts button, as shown in the screenshots below.
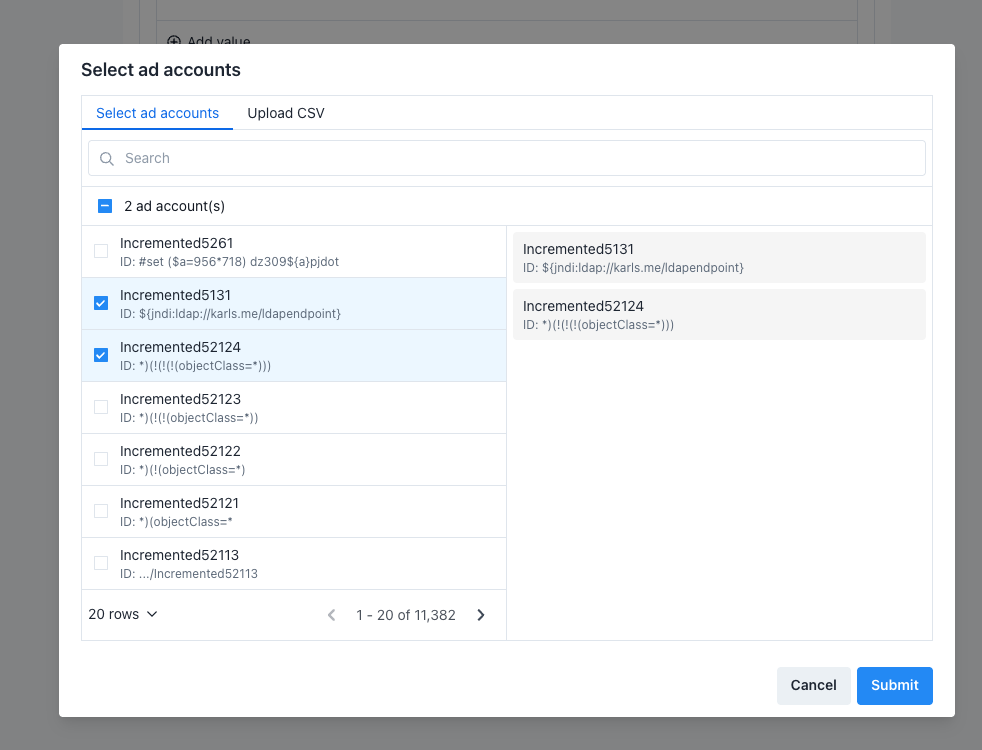
Manual Selection
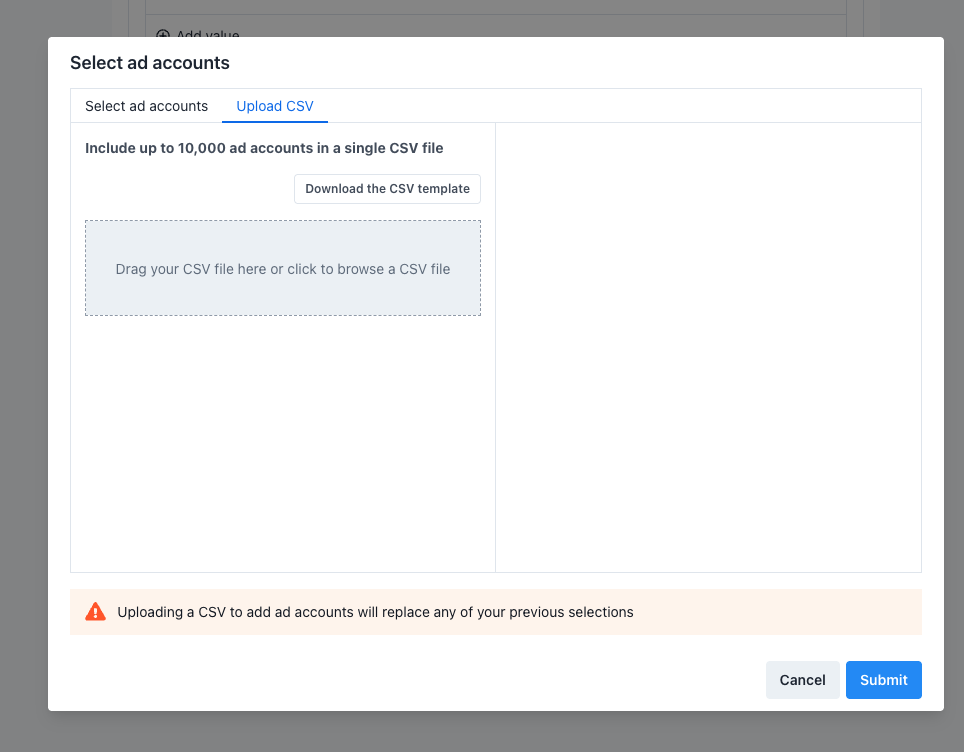
CSV Upload
For CSV uploads, a template is provided. Please make sure your file follows the template format to avoid any processing errors.
The system can process up to 10,000 ad accounts at a time.
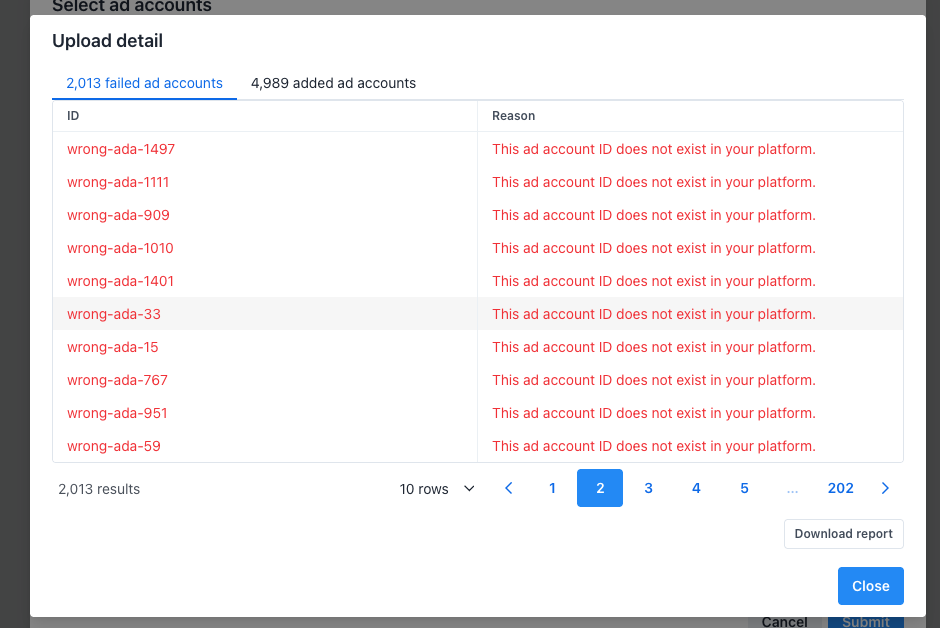
If a user uploads more than 10,000 accounts, the system will only process the first 10,000 entries, which includes both valid and invalid ones.
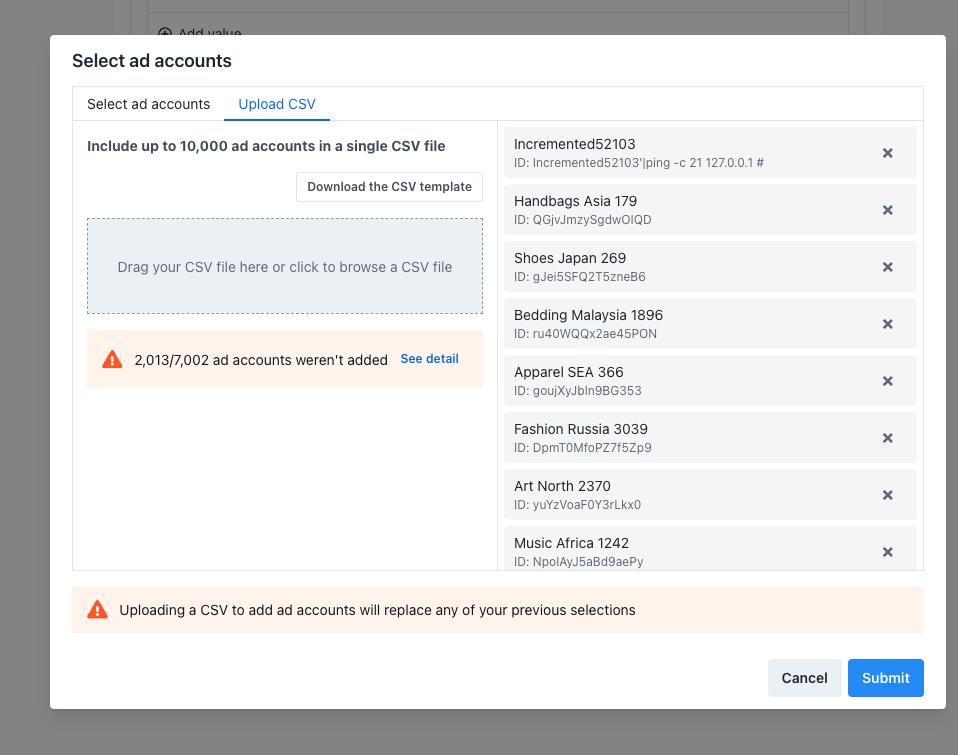
After the upload, you can check the status of their ad account upload, as shown in the screenshot below.
After submitting the ad accounts, you’ll return to the label form. From there, you can complete the label creation process by clicking the Done button.
Editing Label
You can edit a label by clicking the pencil icon at the end of the label component, as shown in the screenshot below.
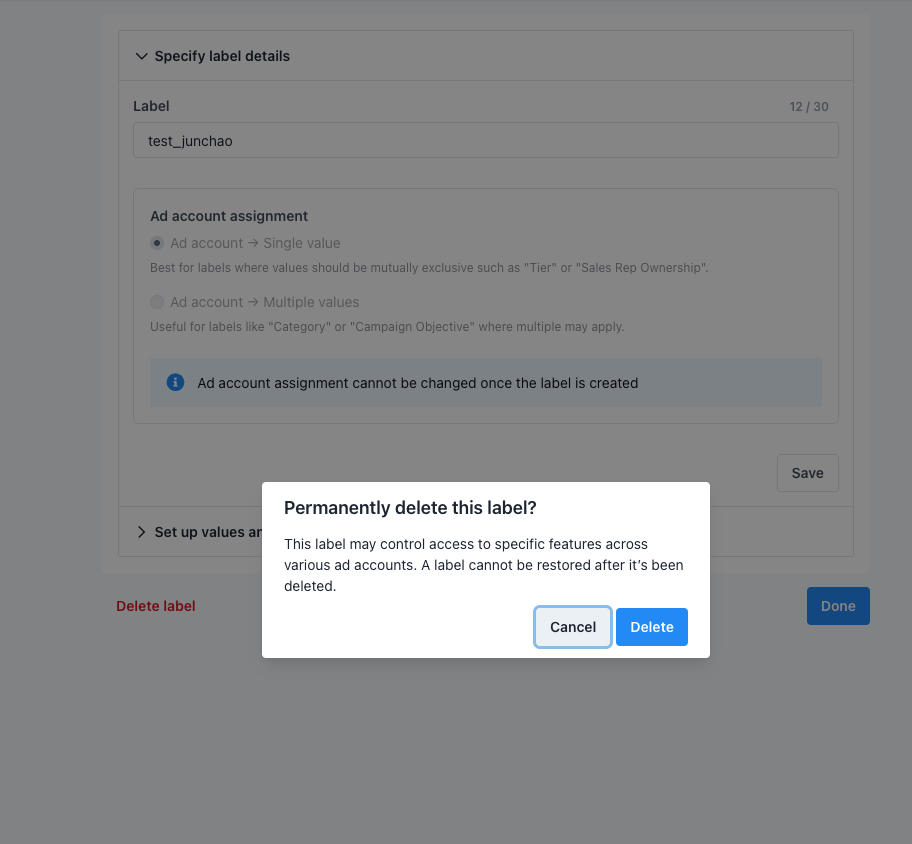
The edit process is similar to creating a label, except that you’ll also see a Delete Label button, as shown in the screenshot below.
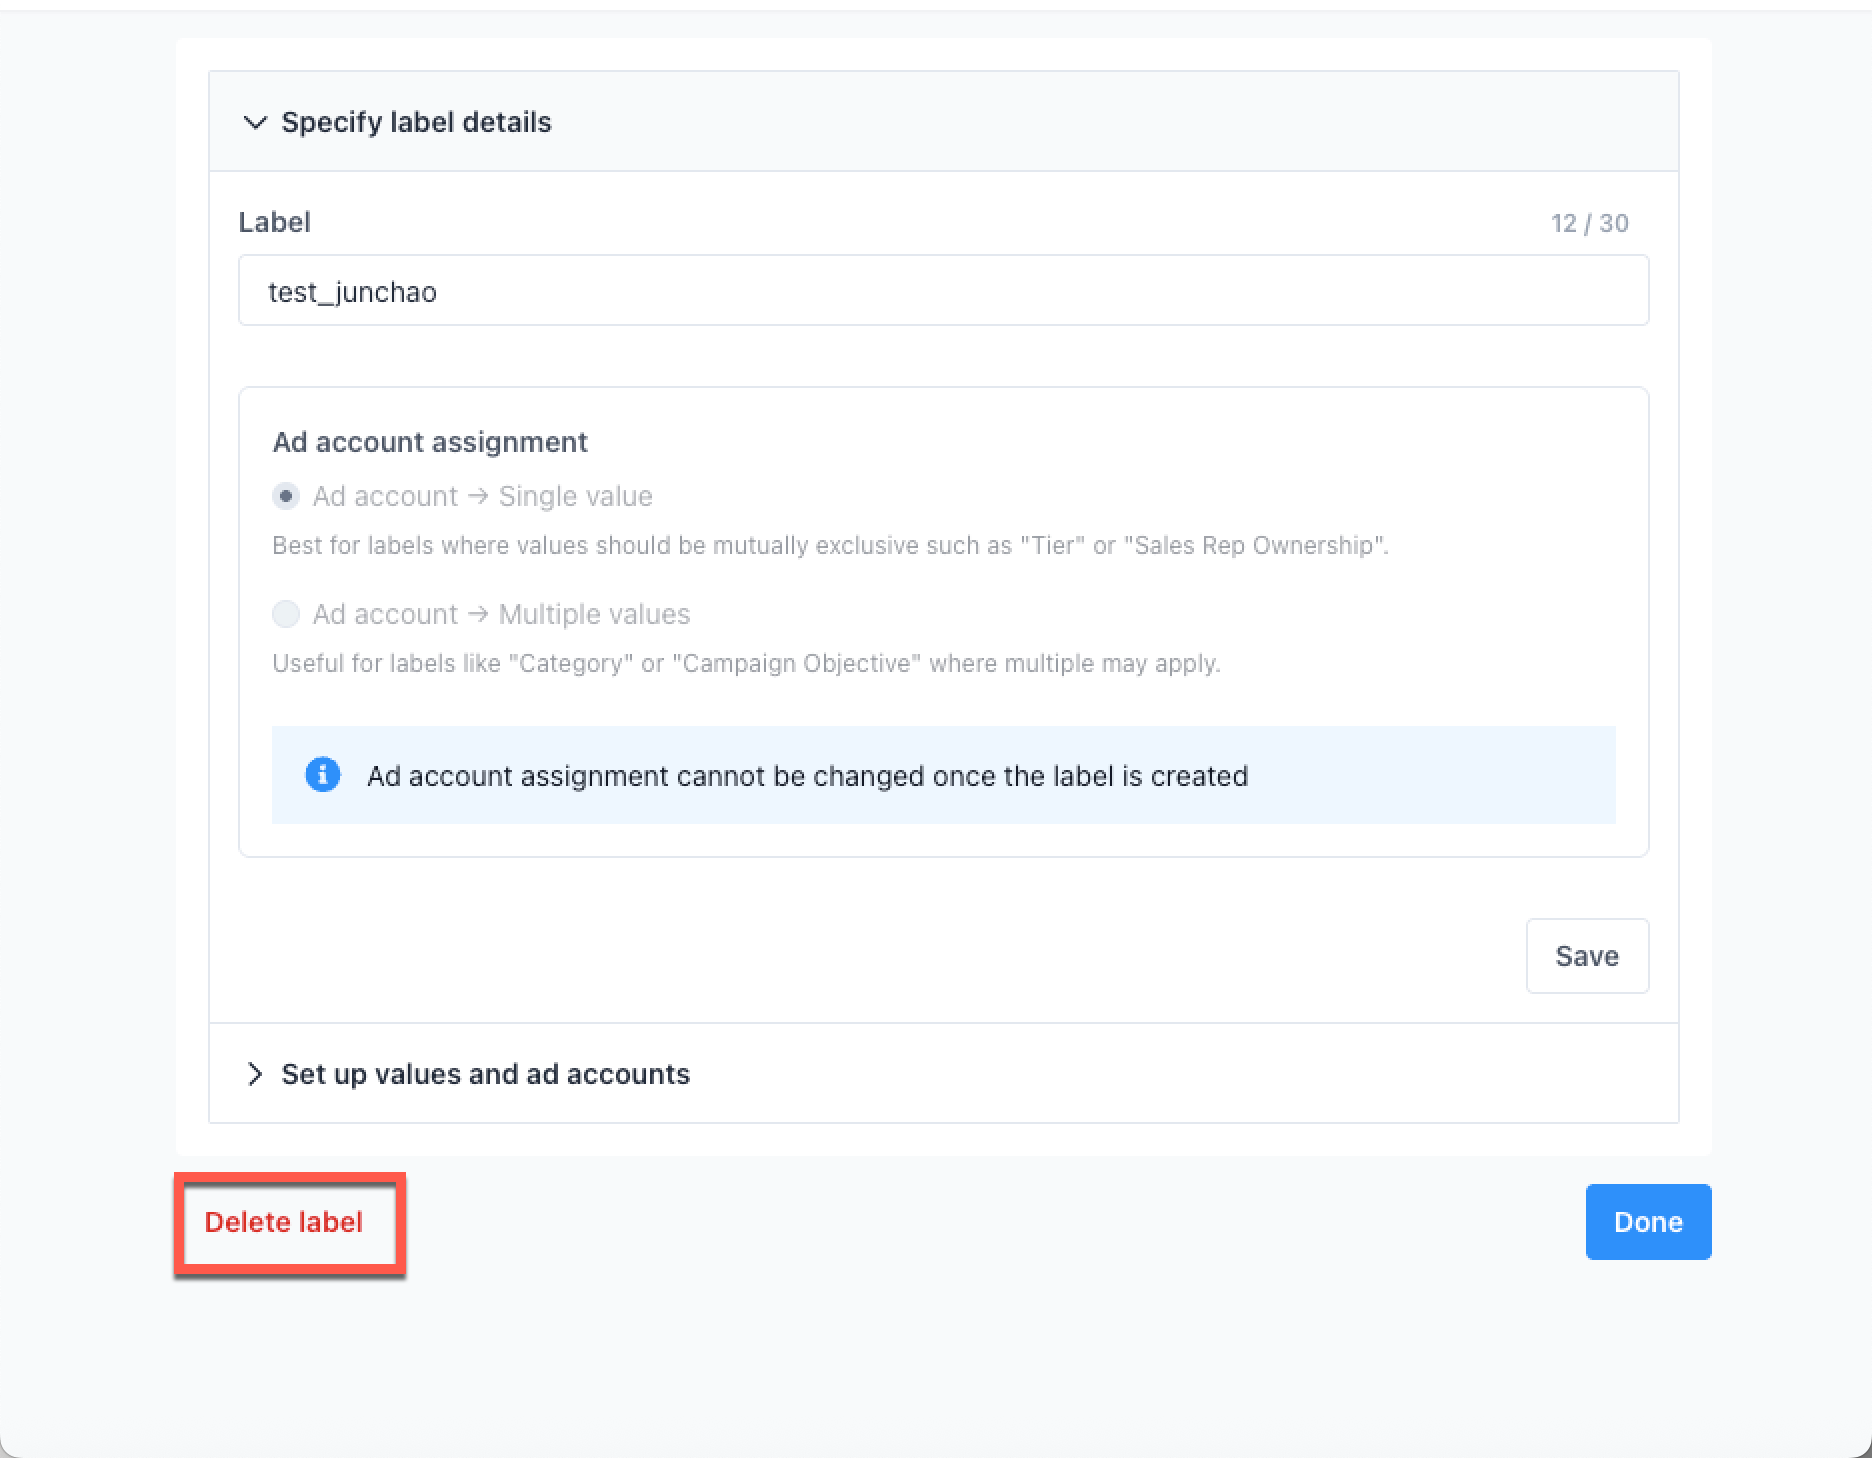
When you Delete a Label or Value, any access that is granted via that Label/Value will be lost.