Widgetized campaign manager
Introduction
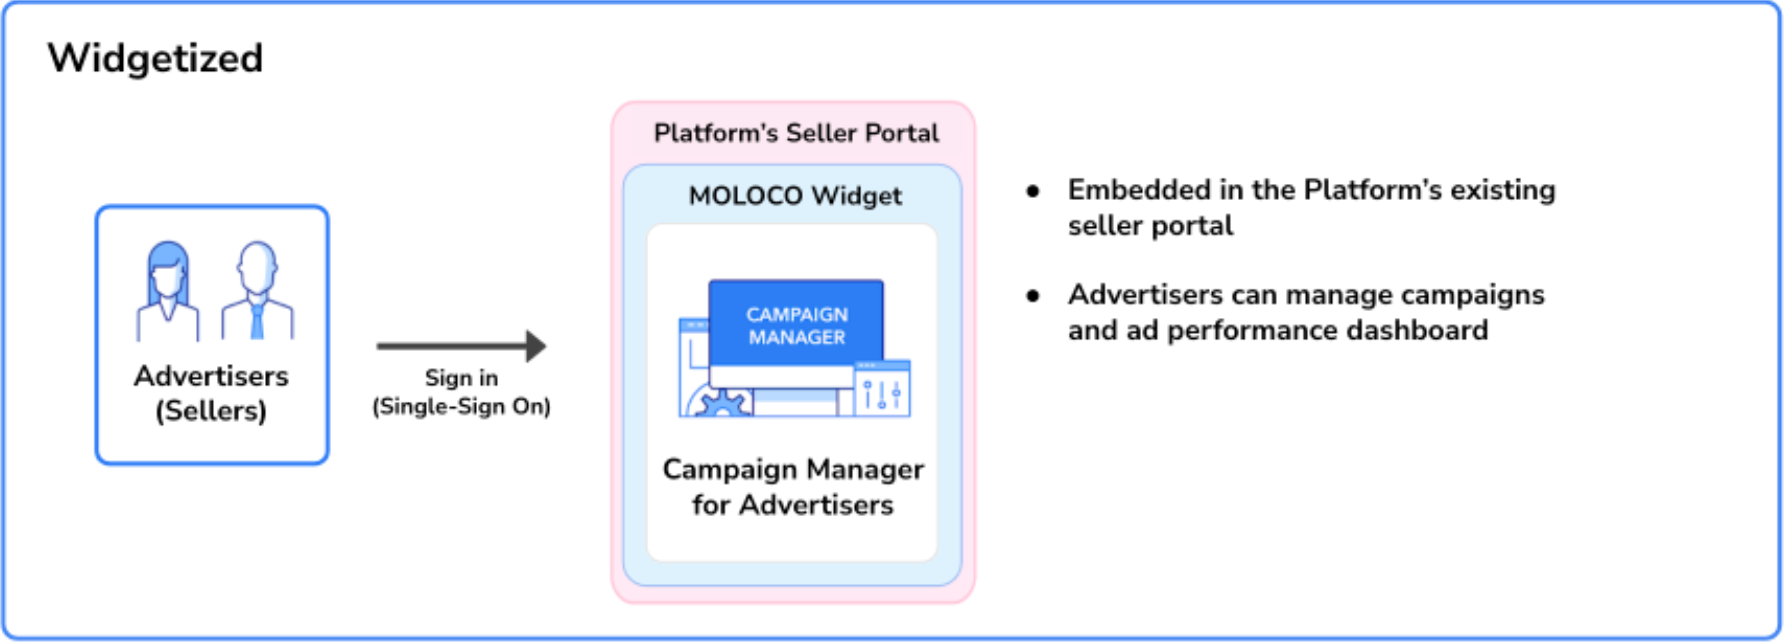
Widgetized Campaign Manager enables you to seamlessly integrate the pre-built Campaign Manager with your existing system without requiring your advertisers/sellers to have a separate login for campaign management. You can start the integration process by creating an SSO URL. The URL contains all the information needed to properly initiate the Widgetized Campaign Manager, including the ID of the user in your system, the ad account that the user will be able to access, and the role you want to give the user. Then, you will sign the URL with a secret key provided by Moloco. Once the URL is generated and signed, it is ready to be used. The Widgetized Campaign Manager can be presented by putting it in an iframe.

Widgetized Campaign Manager
Required information
Before creating your SSO URL, you’ll want to determine all the information that must be included.
SSO secret key
Your SSO secret can be found in the Standalone Campaign Manager, in the Developer side menu under Credential Management. Please remember that the SSO secret works like a master password for the entire ad platform. Please ensure the secret key is stored in a secure location using encryption.
Platform ID
Your Moloco representative will issue your Platform ID during the onboarding process.
Ad Account ID and Title
You will need to set the ID and title of the ad account which will associate it to the ad account user. The Widgetized Campaign Manager will create a new ad account if the Ad account ID has never been used before. The Campaign Manager will also update the title of the ad account when signing in via this SSO workflow if it differs from the current title we stored in the database. You must use the same IDs in the seller_id column found in the catalog feed if the ad account is a seller in the platform.
User roles
For more information please review the User Roles & Permissions page.
Path
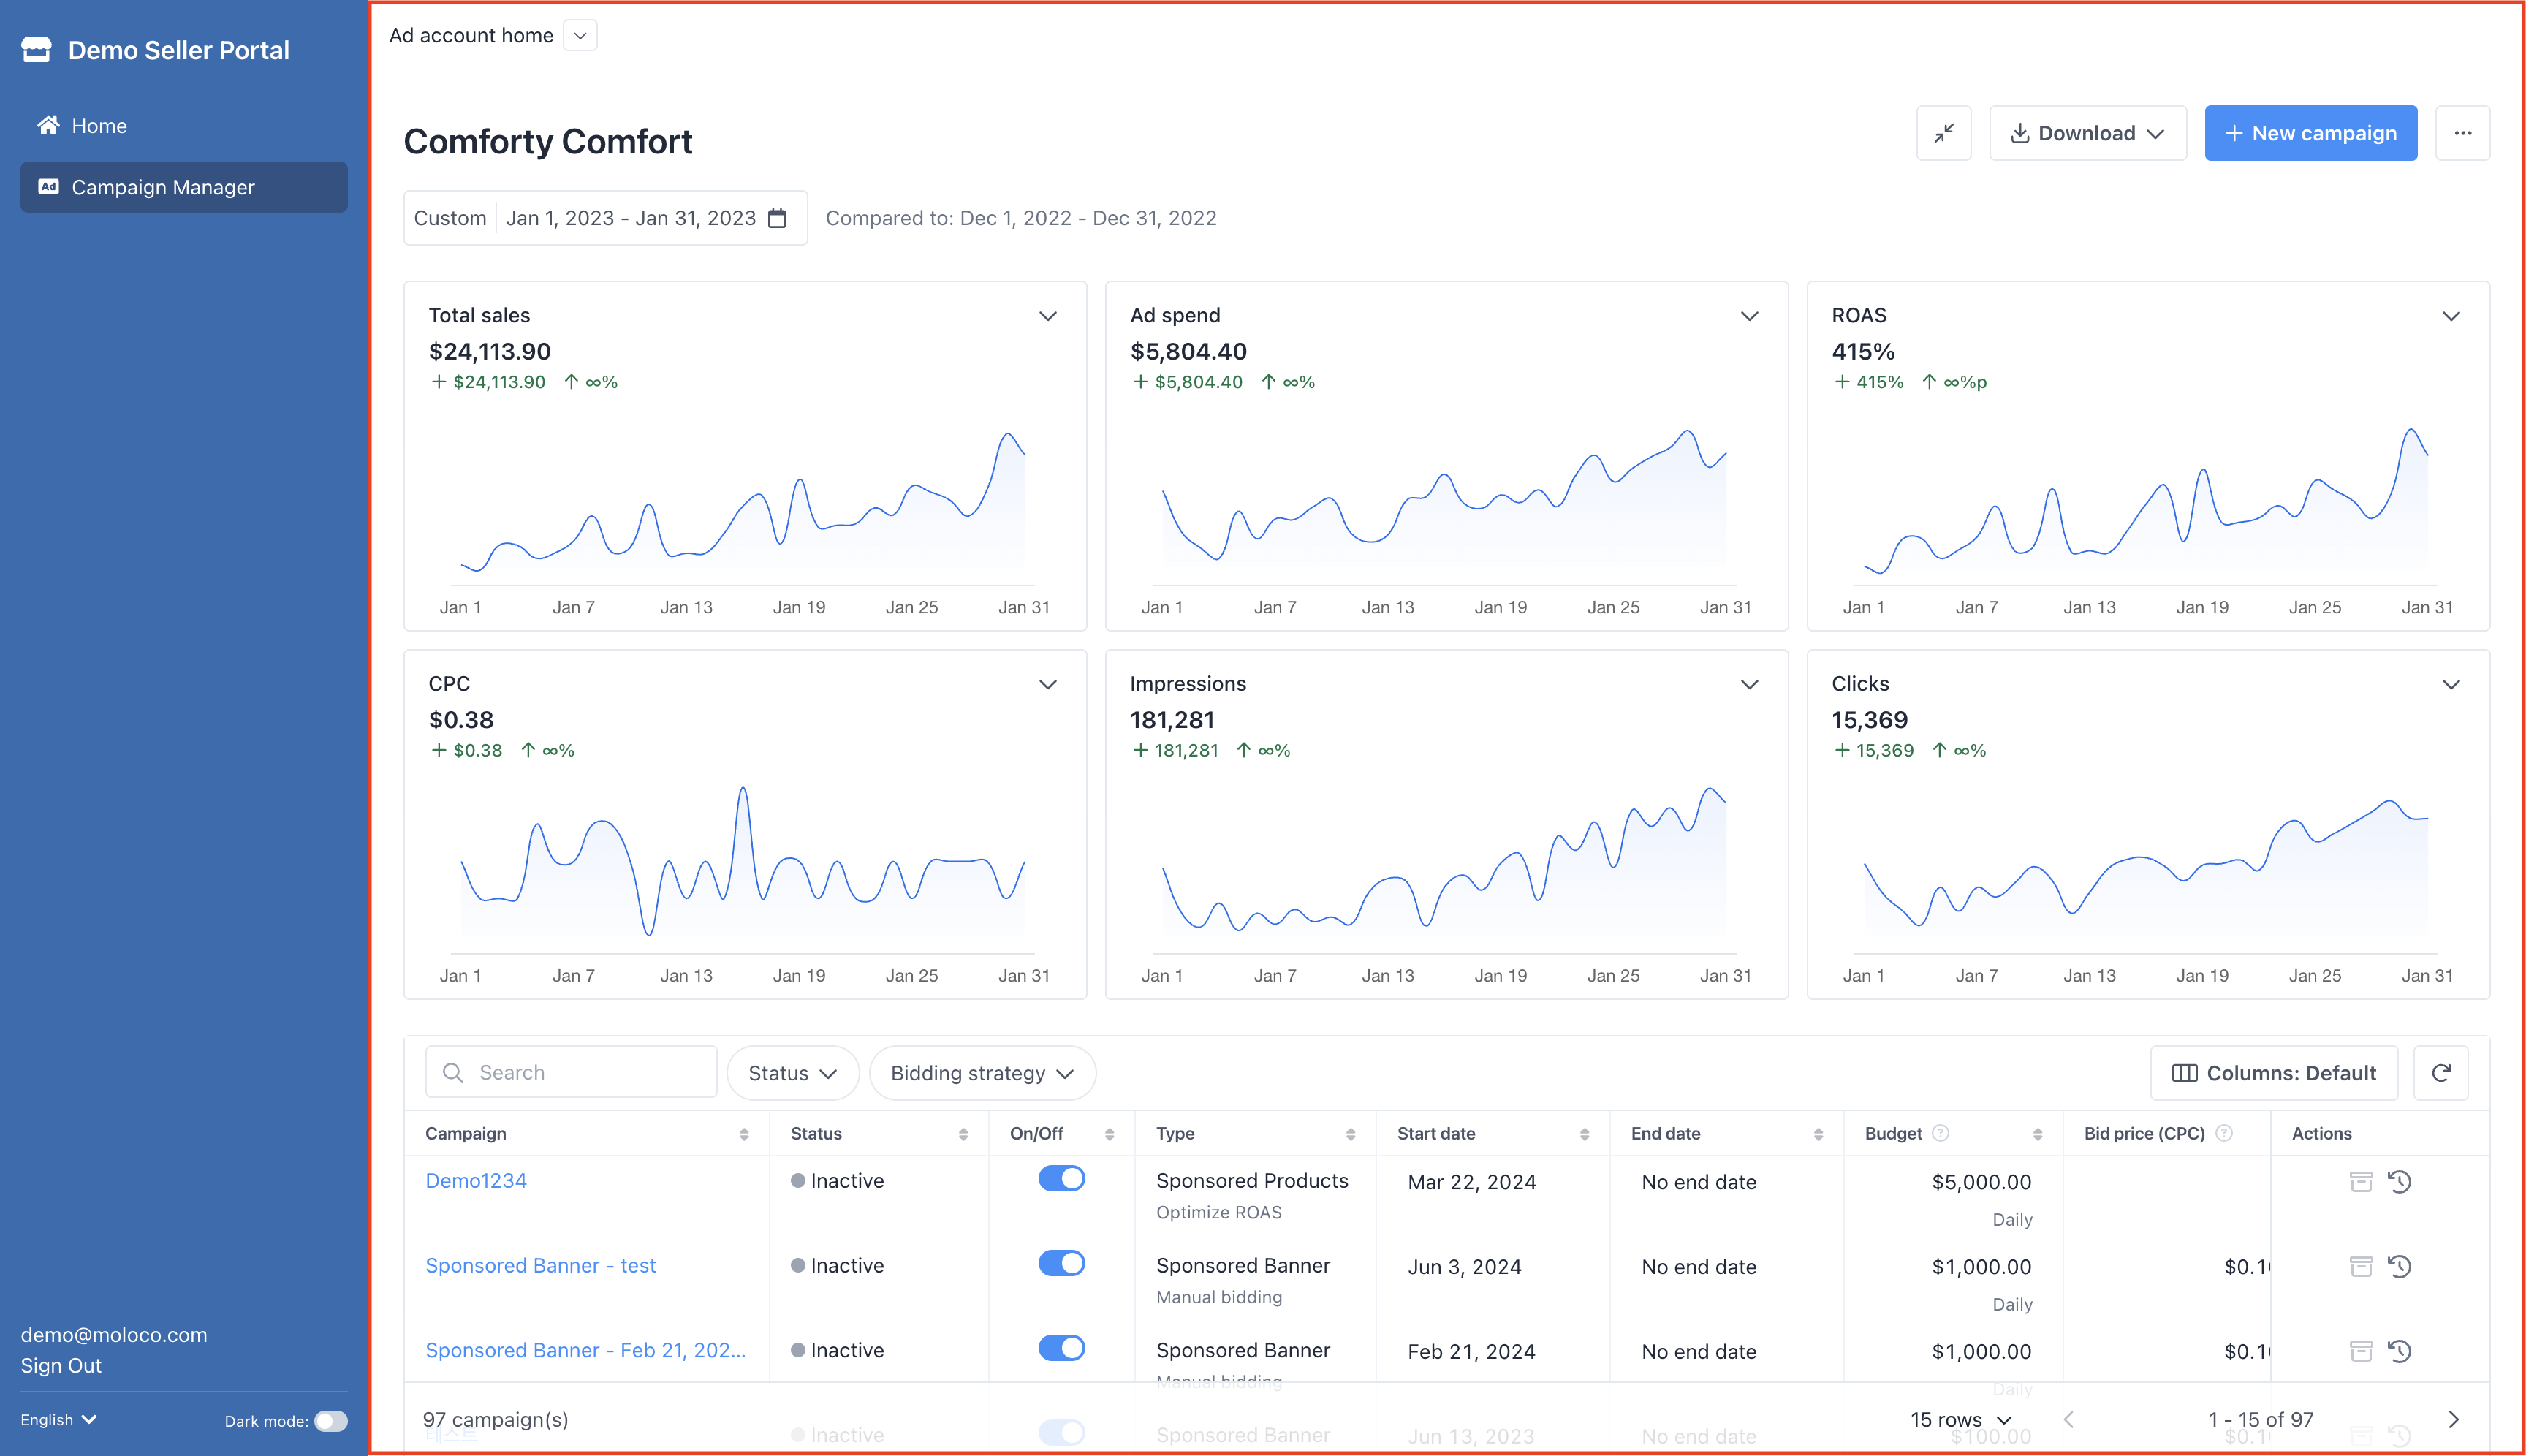
Path defines the first screen that users will see after the SSO process. Ad Account Home would be the best choice for most use cases because it provides core performance metrics and all the features that are needed to manage ad campaigns To use it as the first page, set it as /embed/sponsored-ads/cm/a/[ad-account-id]. If you’d like to set a specific page as a landing page, please contact your Moloco representative.
Build the SSO URL
The following sections will guide you on how to build your SSO URL. Building and signing your SSO URL will require you to write code. Please examine our sample code repository before you start: https://github.com/moloco-mcm/sso-examples.
An SSO Login URL has the following format:
https://[host]/sso?[parameters]&signature=[signature]
Host
The host is the location where the MCM portal is hosted. Please use the domain name that your Moloco representative provided during the onboarding process.
Parameters
The following parameters should be provided to specify the information required to process the request.
Parameter | Data Type | Required or Optional | Note |
|---|---|---|---|
path | String | Required | The path to the landing page.
Example:
|
platform_id | String | Required | A unique identifier for the platform in the MCM Portal.
Example:
|
ad_account_id | String | Required | A unique identifier for the ad account in the MCM Portal.
Example:
|
name | String | Required | User's name |
String | Required | User's email address | |
role | String | Required | User's role. It must be one of the following:
|
external_user_id | String | Required | A unique identifier for the user in your system. (Limit: |
timestamp | Integer | Required | The current time in a UNIX timestamp in seconds (NOT in milliseconds).
Example:
|
nonce | String | Required | Any random string that cannot be repeated within an hour. This helps to prevent an attacker from re-submitting a legitimate SSO URL to take control over the user.
Example:
|
version | String | Required | The version of the signature. Always put the value as |
ad_account_title | String | Optional | The title or name of the ad account. If omitted and the ad account is not yet created, ad_account_id will be used as the title. |
config:language | String | Optional | UI language. For example, use |
config:color_mode | String | Optional | UI color mode. Set the value as |
Signature
Every valid SSO Login URL must be signed with the pre-registered secret key. The steps to sign an SSO Login URL are as follows.
1. Gather all parameters in alphabetical order
Parameters with the “config:” prefix should not be included.
const params = [
 'ad_account_1234', // ad_account_id
 'Test ad account', // ad_account_title
 '[email protected]', //  email
 'User_1234', // external_user_id
 'John Smith', //  name
 '07e00c8b8b99', // nonce
 '/embed/sponsored-ads/cm/a/ad_account_1234', // path
 'GS_SHOP', // platform_id
 'AD_ACCOUNT_OWNER', // role
 '1625771555', // timestamp in string format
 '1.0.0', // version
];
2. Concatenate the values with line break \n.
\n.const concatenatedString = params.join('\n');
/*
ad_account_1234
Test ad account
[email protected]
User_1234
ads.rmp-moloco.com
John Smith
07e00c8b8b99
/embed/sponsored-ads/cm/a/ad_account_1234
GS_SHOP
AD_ACCOUNT_OWNER
1625771555
1.0.0
*/3. Create a signature by hashing the string we created in the previous step using HMAC-SHA256 with base64 encoding and your SSO secret key.
const crypto = require('crypto');
const signature = crypto.createHmac('sha256', 'secret').update(concatenatedString).digest('base64');

/*
7uruQXp6crvhz/ZhgiOWElkPrU9wpWo2Ho1ctM+1JZ4=
*/
CautionSSO URLs with timestamps older than 5 mins will be considered expired. Always generate the SSO URLs on the fly; do not pre-generate or cache the SSO URL.
Present the campaign manager
Once you get the final signed SSO URL, you can present the Widgetized Campaign Manager by setting it as the “src” attribute of an iframe tag.
<iframe src="<https://rmp-sample-domain.com/sso?ad_account_id=ad-account-id&ad_account_title=My+Ad+Account&email=test%40example.com&external_user_id=user-id&name=Example+User+Name&nonce=OdWlPI8W4XMzoKzJMqU%2F%2FB75wJQ%3D&path=%2Fembed%2Fsponsored-ads%2Fcm%2Fa%2Fad-account-id&platform_id=RMP_PLATFORM_ID&role=AD_ACCOUNT_OWNER×tamp=1636003094&version=1.0.0&signature=9B9Ls%2Bktk7NIAckz2vFXtF6jppjJF44jl8TGP%2FO%2Fjog%3D&config:color_mode=light&config:language=en>" style="width: 800px; height: 600px;" />
CautionThe Widgetized Campaign Manager does not persist user login sessions. User sessions will be cleared as soon as the iframe element that hosts the Campaign Manager is unmounted. In the case that the user wants to return to the Campaign Manager after visiting different pages, you’ll need to create another SSO URL. For enhanced security, SSO URLs are valid only for 5 minutes after creation. Please avoid pre-generating or caching the URLs.
The screenshot below shows how Widgetized Campaign Manage will look like after loaded in an iframe.

Updated 15 days ago
